
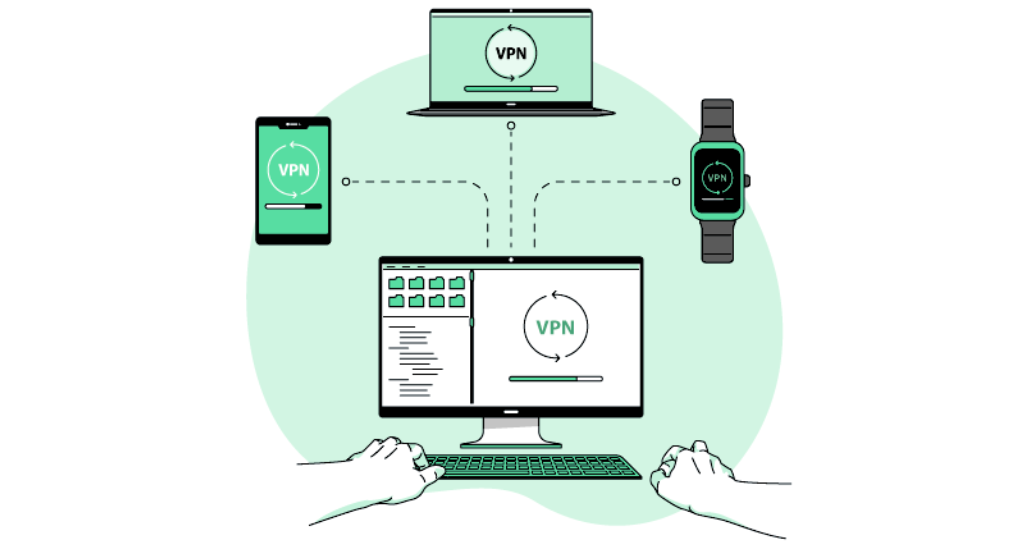
Setting up a VPN on multiple devices can seem tricky. But it doesn’t have to be.
VPNs protect your online privacy and secure your data. They are essential for anyone using the internet on multiple devices. In today’s digital age, we use various gadgets daily. From smartphones and tablets to laptops and smart TVs, our devices are always connected.
Each device can be a potential entry point for hackers. Setting up a VPN on all your devices ensures you stay safe online. This blog will guide you through the process. It will explain how to set up a VPN on each device step-by-step. By the end, you’ll be able to protect your data on all your gadgets. Let’s dive in and secure your digital world!
Credit: nordvpn.com
Benefits Of Using A Vpn
Using a VPN on multiple devices provides numerous benefits. A VPN, or Virtual Private Network, helps you stay secure and access restricted content. This section will explain the benefits of using a VPN.
Enhanced Security
A VPN enhances your online security. It encrypts your data, making it hard for hackers to access. This is important if you use public Wi-Fi. Public networks are often unsafe. A VPN protects your personal information, such as passwords and bank details. It also hides your IP address. This makes it difficult for websites to track your online activities. Your privacy is better protected.
Accessing Restricted Content
Many websites restrict content based on your location. With a VPN, you can bypass these restrictions. You can access content from other countries. This includes streaming services, news sites, and social media platforms. A VPN masks your IP address, making it look like you are browsing from another country. This allows you to enjoy your favorite shows and access blocked websites. A VPN provides more freedom on the internet.
Credit: learn.microsoft.com
Choosing The Right Vpn Service
Choosing the right VPN service is crucial when you want to set up a VPN on multiple devices. The right VPN not only ensures your data remains private and secure but also provides a seamless experience across all your gadgets. Let’s dive into the factors you should consider and explore some top VPN providers that can meet your needs.
Factors To Consider
When picking a VPN service, several key factors come into play. Here are some important considerations to keep in mind:
- Device Compatibility: Ensure the VPN supports all your devices, be it smartphones, tablets, laptops, or routers.
- Number of Simultaneous Connections: If you have many devices, check how many connections the VPN allows at the same time.
- Speed and Performance: A good VPN should offer fast speeds to avoid buffering during streaming or lag during gaming.
- Privacy and Security: Look for a VPN with strong encryption, a no-logs policy, and additional features like a kill switch.
- Ease of Use: The VPN should have a user-friendly interface and provide good customer support.
- Price: Consider your budget. While free VPNs exist, they often come with limitations. Paid options usually offer better features and reliability.
Top Vpn Providers
Here are some of the top VPN providers that tick most, if not all, of the above boxes:
- ExpressVPN: Known for its excellent speed and strong security features. It supports a wide range of devices and allows up to 5 simultaneous connections.
- NordVPN: Offers robust security, a strict no-logs policy, and up to 6 simultaneous connections. It’s also quite affordable.
- CyberGhost: User-friendly and great for beginners. It supports up to 7 devices at the same time and has good speed for streaming.
- Surfshark: Allows unlimited simultaneous connections, making it perfect for large families or small businesses. It’s also budget-friendly.
- Private Internet Access (PIA): Offers strong security features and supports up to 10 devices simultaneously. It’s also known for its affordability.
Still unsure which VPN to pick? Think about what matters most to you – be it speed, security, or the number of devices you can connect. Remember, the right VPN should make your online life easier, not harder. So choose wisely, and happy browsing!
Setting Up A Vpn On Windows
Setting up a VPN on your Windows device can seem like a daunting task, especially if you’re not a tech wizard. But fear not! With a little guidance, you’ll have your VPN up and running in no time, ensuring your online activities remain private and secure. In this section, we’ll walk you through the steps to install and configure a VPN on your Windows computer.
Installation Steps
First things first, let’s get that VPN software onto your Windows device. Here’s a simple guide to help you:
- Choose a VPN Provider: There are many VPN services available. Some popular ones include NordVPN, ExpressVPN, and CyberGhost. Select one that suits your needs.
- Sign Up and Download: Visit the website of your chosen VPN provider. Sign up for an account, and then download the Windows application.
- Run the Installer: Once the download is complete, open the installer file. Follow the on-screen instructions to install the software.
- Log In: After installation, launch the VPN application. Log in with the account details you created during the sign-up process.
Configuration Guide
Now that the VPN software is installed, it’s time to configure it. This part is crucial for ensuring your VPN works correctly. Follow these steps:
- Select a Server Location: Most VPNs offer a list of server locations. Choose one based on your needs. For example, if you want to access content available in the US, select a server in the United States.
- Adjust Settings: Navigate to the settings menu of your VPN application. Here, you can customize various options. For beginners, the default settings are usually sufficient.
- Enable Kill Switch: If your VPN has a kill switch feature, enable it. This feature will automatically disconnect your internet if the VPN connection drops, ensuring your data isn’t exposed.
- Connect to the VPN: Once you’ve configured the settings, click the connect button. Your VPN will establish a secure connection to the selected server.
- Verify Connection: To ensure your VPN is working, visit a website like WhatIsMyIPAddress.com. It should display the IP address of the server location you selected, not your actual IP address.
And that’s it! You now have a VPN set up and configured on your Windows device. Remember, using a VPN is a great way to protect your online privacy and keep your data secure. Happy browsing!

Credit: surfshark.com
Setting Up A Vpn On Macos
Are you looking to secure your online activities on your Mac? Setting up a VPN on macOS is a great way to ensure privacy and security. It’s easier than you might think, and we’re here to guide you through the process step by step. Ready to dive in? Let’s get started!
Installation Steps
First things first, you’ll need to install the VPN software. Here’s how you can do it:
- Choose a VPN provider: There are many options out there, so pick one that suits your needs.
- Download the app: Go to the provider’s website and download the macOS app.
- Open the installer: Find the downloaded file in your Downloads folder and double-click it to start the installation.
- Follow the prompts: Follow the on-screen instructions to complete the installation. You’ll need to agree to the terms and conditions.
- Launch the VPN app: Once installed, open the app and sign in with your account details.
Easy, right? Now, let’s move on to configuring the VPN.
Configuration Guide
After installation, you need to configure the VPN settings. Here’s a simple guide:
- Open System Preferences: Click on the Apple icon in the top left corner of your screen and select System Preferences.
- Go to Network: In the System Preferences window, click on Network.
- Add a VPN connection: Click the plus (+) button at the bottom of the list on the left side. Select VPN from the interface dropdown menu.
- Choose VPN type: Select the type of VPN you are using (e.g., L2TP over IPSec, IKEv2, etc.) and give it a name.
- Enter server details: Fill in the server address and account name provided by your VPN provider.
- Authentication settings: Click on Authentication Settings and enter your VPN account password and shared secret or certificate if required.
- Apply and connect: Click Apply to save the settings. Select your new VPN connection from the list and click Connect.
And there you have it! Your VPN should now be up and running on your macOS device. You can browse the internet with peace of mind, knowing your data is secure. Stay safe out there!
Setting Up A Vpn On Ios
Setting up a VPN on iOS might sound like a daunting task, but it’s easier than you think. Whether you want to secure your internet connection or access geo-restricted content, a VPN can be a game-changer. Here’s a simple guide to help you navigate through the process and get your iOS device up and running with a VPN in no time.
Downloading The App
The first step to setting up a VPN on your iOS device is downloading the app. Here’s how you can do it:
- Open the App Store: Tap on the App Store icon on your home screen.
- Search for a VPN app: Type the name of your VPN provider in the search bar. If you don’t have one, you can search for popular options like NordVPN, ExpressVPN, or CyberGhost.
- Download the app: Once you find the app, tap on the download button (it looks like a cloud with an arrow). Wait for the app to install on your device.
Simple, right? Now that you have the app, let’s move on to connecting to a server.
Connecting To A Server
Once the VPN app is installed, connecting to a server is straightforward. Follow these steps:
- Open the VPN app: Locate the app on your home screen and tap to open it.
- Log in: Enter your username and password. If you don’t have an account yet, you’ll need to sign up first.
- Choose a server: Most VPN apps will display a list of servers. You can choose a server based on the country you want to connect to or let the app select the best option for you.
- Connect: Tap the connect button. The app will take a few seconds to establish a connection. Once connected, you’ll see a VPN icon at the top of your screen.
And just like that, you are now connected to a VPN server! This means your internet activity is encrypted, and you can browse safely and access content from different regions.
Setting up a VPN on iOS is really that simple! Whether you are a tech novice or a seasoned pro, following these steps will ensure you are protected and connected in no time. Stay safe and happy browsing!
Setting Up A Vpn On Android
Setting up a VPN on your Android device can help you secure your online activities and access content that might be restricted in your region. It’s a straightforward process, even if you’re not a tech expert. In this guide, we’ll walk you through the steps to get your VPN up and running on your Android phone or tablet. By the end, you’ll be browsing the internet safely and freely. Let’s dive in!
Downloading The App
The first step to setting up a VPN on your Android device is to download the app from your VPN provider. Most reputable VPN services have a dedicated app for Android users. Here’s how you can do it:
- Open Google Play Store: Launch the Google Play Store app on your Android device. It’s usually located on your home screen or in the app drawer.
- Search for the VPN: In the search bar at the top, type in the name of your VPN provider (e.g., NordVPN, ExpressVPN) and press enter.
- Select the App: Find the official app from your VPN provider in the search results. Be sure to check for the verified badge to avoid downloading fake apps.
- Install the App: Tap the ‘Install’ button to download and install the app on your device. This might take a few moments, depending on your internet speed.
And just like that, you’ve successfully downloaded your VPN app. Now, let’s move on to connecting to a server.
Connecting To A Server
With the VPN app installed, it’s time to connect to a server. This is where the magic happens – your internet traffic will be routed through the VPN, masking your IP address and encrypting your data. Follow these steps to connect:
- Open the VPN App: Launch the VPN app you just installed. You might need to log in with your account credentials if you haven’t already.
- Choose a Server: Most VPN apps will show a list of available servers. You can usually select a server based on its location. For example, if you want to access US content, choose a server in the United States.
- Connect to the Server: Tap the ‘Connect’ button. The app will take a few moments to establish a secure connection. Once connected, you should see an icon in your notification bar indicating the VPN is active.
And there you have it! You’re now connected to a VPN server, which means your online activities are more secure and private. Plus, you can access content that might be restricted in your area. Pretty neat, right?
Setting up a VPN on Android is really that simple. With just a few taps, you’ve added an extra layer of security to your internet browsing. Stay safe and happy surfing!
Setting Up A Vpn On Linux
Setting up a VPN on Linux can seem challenging. But with the right steps, it becomes straightforward. Linux users have the advantage of flexibility. This guide covers setting up a VPN using terminal commands. Follow these simple steps to ensure your connection is secure and private.
Using Terminal Commands
Using terminal commands is a popular method. First, open your terminal. Then, install OpenVPN. Type the command: sudo apt-get install openvpn. Press Enter. The system will ask for your password. Enter it and wait for the installation to complete.
Next, download your VPN provider’s configuration files. These files are usually in a .ovpn format. Save them to your preferred directory. Navigate to this directory using the terminal. Type cd /path/to/your/config/files. Press Enter.
Now, connect to the VPN. Type sudo openvpn --config yourfile.ovpn. Press Enter. The terminal will display connection logs. Wait until you see the message “Initialization Sequence Completed.” You are now connected to the VPN.
Configuration Guide
Configuring a VPN on Linux requires a few steps. First, create a new directory for your VPN files. Type mkdir ~/vpn. Press Enter. Move your .ovpn files to this directory. This keeps your files organized.
Next, edit the .ovpn files if necessary. Use a text editor like Nano. Type nano ~/vpn/yourfile.ovpn. Press Enter. Make any needed changes. Save the file by pressing Ctrl + O. Exit Nano by pressing Ctrl + X.
For automatic connection, create a new systemd service file. Type sudo nano /etc/systemd/system/vpn.service. Press Enter. Add the following lines:
[Unit]
Description=OpenVPN connection
After=network.target

[Service]
ExecStart=/usr/sbin/openvpn --config /path/to/your/config/files/yourfile.ovpn
Restart=always
RestartSec=3

[Install]
WantedBy=multi-user.target
Save and exit. Enable the service by typing sudo systemctl enable vpn.service. Start the service with sudo systemctl start vpn.service. Your VPN will now connect automatically at startup.
Troubleshooting Common Issues
Setting up a VPN on multiple devices can sometimes feel like solving a puzzle. You think you have all the pieces, but there’s always that one piece that just won’t fit. Don’t worry, it’s a common problem. In this section, we’ll explore some of the most common issues you might face and how to tackle them with ease.
Connection Problems
One of the most frustrating issues is when your VPN just won’t connect. Here are a few things to check:
- Internet Connection: Ensure your device is connected to the internet. Sometimes, the problem isn’t with the VPN at all.
- Server Status: Check if the VPN server you’re trying to connect to is online. VPN providers usually have a status page for this.
- Reboot Devices: It sounds simple, but turning your device off and on again can often fix connection issues.
- Update Software: Make sure your VPN app is up to date. Outdated software can cause connection problems.
Slow Speeds
Experiencing slow speeds can be a real drag, especially when you’re trying to stream or download something important. Here’s what you can do:
- Choose a Closer Server: Connecting to a server that is geographically closer to you can increase your speed.
- Check for Bandwidth Limits: Some VPNs have bandwidth limits. Ensure you haven’t hit your limit.
- Switch Protocols: VPNs use different protocols. Sometimes, switching from OpenVPN to IKEv2 or vice versa can improve speeds.
- Disable Background Apps: Applications running in the background can use up bandwidth. Close unnecessary apps to free up speed.
Remember, troubleshooting is a process of elimination. Start with the simplest solutions and work your way up. With a bit of patience, you’ll have your VPN running smoothly across all your devices in no time!
Frequently Asked Questions
Can One Vpn Be Used On Multiple Devices?
Yes, most VPNs allow use on multiple devices. Check your VPN provider’s policy for device limits.
Does Every Device Need Its Own Vpn?
Yes, each device needs its own VPN for maximum security. This ensures privacy and protection on all your devices.
How Do I Add A Vpn To Another Device?
Download the VPN app from your provider’s website or app store. Install the app on your device. Log in with your account credentials. Select a server and connect. Your VPN is now active on the device.
Is There A Downside To Always Using A Vpn?
Yes, using a VPN can slow down your internet speed. Some websites may block VPN traffic. Not all VPNs ensure complete privacy.
Conclusion
Setting up a VPN on multiple devices is simple and secure. Follow the steps outlined to protect your privacy. Ensure each device has the VPN app installed. Connect to the same VPN server for consistent protection. Always update your VPN software for the latest features.
Troubleshoot any issues by checking your internet connection. Enjoy safe browsing on all your devices. Stay secure online with your VPN setup. Happy surfing!