
Migrating a website to a new hosting provider may seem daunting. But with the right steps, it can be smooth and stress-free.
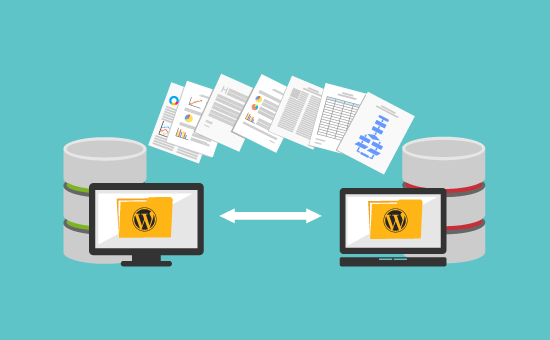
Changing your website’s hosting provider is like moving to a new home. You need to pack everything carefully, transport it safely, and unpack it at the new place. This process involves preparing your website, backing up data, transferring files, and ensuring everything works well afterward.
Understanding the migration steps can save you from potential issues and downtime. In this guide, we will walk you through each step to make your website migration as seamless as possible. Whether you are switching for better performance, support, or pricing, follow these steps to ensure a successful transition.
Preparation Steps
Migrating a website to a new hosting provider can be daunting. Proper preparation can make the process smoother. Here are essential steps to take before the move.
Evaluate Current Hosting
First, assess your current hosting provider. Check server performance, uptime, and support quality. Identify any issues that prompted the move. This helps in choosing a better host. Note down your website’s resource usage. This includes disk space, bandwidth, and database size. Ensure the new host can meet these requirements.
Backup Website Data
Backing up your website data is critical. Create a full backup of all files and databases. Use tools provided by your current host or third-party services. Store the backup in a safe location. This ensures you have a copy in case anything goes wrong during the migration. Verify that the backup is complete and functional. This step is crucial to avoid data loss.
Credit: www.webfulcreations.com
Choosing A New Hosting Provider
So, you’ve decided it’s time to migrate your website to a new hosting provider. Maybe you’re looking for better performance, more features, or superior customer support. Whatever the reason, choosing the right hosting provider is a crucial step in ensuring a smooth migration and ongoing success for your website. Let’s dive into the essential factors to consider when selecting your new hosting provider.
Compare Hosting Plans
First things first, you need to compare hosting plans offered by different providers. Not all hosting plans are created equal, and it’s essential to find one that suits your specific needs. Here are some key points to consider:
- Storage and Bandwidth: Ensure the plan offers enough storage space and bandwidth for your website’s requirements.
- Uptime Guarantee: Look for hosting providers that offer at least a 99.9% uptime guarantee.
- Scalability: Choose a plan that can grow with your website. You don’t want to switch providers again in a few months!
- Cost: Compare the cost of different plans. Sometimes, paying a bit more can get you better features and support.
Many hosting providers offer a variety of plans, from basic shared hosting to dedicated servers. Take the time to analyze what you really need. For instance, if you’re running a small blog, shared hosting might be sufficient. But if you’re managing an online store, a VPS or dedicated server could be more appropriate.
Check Customer Support
Customer support is often overlooked when choosing a new hosting provider, but it is absolutely vital. Imagine your website going down during a crucial sale period, and you can’t reach anyone for help. Not fun, right? Here’s what to look for in customer support:
- 24/7 Availability: Make sure the support team is available round the clock.
- Multiple Channels: Check if they offer various support channels like live chat, email, and phone support.
- Response Time: Look for reviews or test their response time yourself. Quick support can save you a lot of headaches.
- Knowledge Base: A comprehensive knowledge base can help you solve issues on your own.
Having good customer support is like having a safety net. You may not need it all the time, but when you do, it’s a lifesaver. I once had a minor issue with my site’s SSL certificate, and the support team walked me through the fix in just a few minutes. It was a relief knowing they had my back.
In conclusion, choosing a new hosting provider involves careful consideration of hosting plans and customer support. Take your time, do your research, and make sure you pick a provider that aligns with your website’s goals and needs. Happy migrating!
Transferring Domain
Transferring your domain is a crucial step in migrating your website. It involves moving your domain from your old hosting provider to the new one. This process ensures your site remains accessible to users during and after the migration.
Update Dns Settings
To start, you need to update your DNS settings. Log in to your domain registrar account. Locate the section for DNS management. Change the nameservers to those provided by your new hosting provider. This step directs web traffic to your new host. It may take up to 48 hours for changes to propagate. During this time, your site might experience some downtime.
Verify Domain Transfer
After updating the DNS settings, verify the domain transfer. Check if your domain is pointing to the new server. Use tools like WHOIS lookup to confirm the nameserver changes. Ensure that your website loads correctly on the new hosting provider. If you encounter issues, contact your new hosting support. They can assist in troubleshooting.

Credit: www.youtube.com
Migrating Website Files
Migrating website files is a crucial step in moving to a new hosting provider. This process ensures your site remains intact and functional. A smooth migration avoids downtime and retains your site’s SEO rankings. Let’s break down the steps to make this process easier for you.
Upload Files To New Server
First, download all your website files from the current server. Use FTP software like FileZilla for this task. Connect to your existing server and transfer files to your local computer. Ensure you copy all folders, including hidden ones.
Next, connect to your new hosting server using the same FTP software. Upload the downloaded files to the new server. Place them in the correct directory, often the public_html folder. Double-check the file paths to ensure everything is in the right place.
Set Up Database
Your website likely uses a database to store content. Export the database from your current hosting provider. Use tools like phpMyAdmin to perform this task. Save the exported database file on your computer.
Now, create a new database on your new hosting provider. Use the hosting control panel to do this. Import the saved database file into the new database. Use phpMyAdmin again for this step. Ensure all tables and data are correctly imported.
Update your website’s configuration file with the new database details. This file is often named wp-config.php for WordPress sites. Enter the new database name, username, and password. Save the changes and upload this file to the new server.
Test your website to ensure everything works correctly. Check all pages and features. Fix any issues you find to complete the migration.
Configuring New Hosting
Configuring your new hosting provider is a crucial step in migrating your website. This ensures your site runs smoothly without any hiccups. Let’s break down the process into manageable steps.
Adjust Server Settings
First, adjust the server settings. Log into your new hosting account. Navigate to the server settings panel. Ensure the server timezone is correct. This helps with accurate logging and scheduling. Set the PHP version as required by your website. An incompatible PHP version can cause issues. Check for any server-side caching settings. Enable or disable as needed. Modify file permissions to secure your site. Proper file permissions protect your data from unauthorized access.
Install Necessary Software
Next, install the necessary software. Begin with a web server like Apache or Nginx. These servers handle web requests. Install a database server like MySQL or MariaDB. Databases store your website data. Make sure to install PHP or other required scripting languages. These languages run your website code. Don’t forget to install SSL certificates. SSL certificates secure your website with HTTPS. Lastly, add any additional software your site needs. This could include content management systems or frameworks.

Credit: sparkservices.net
Testing The Migration
Congratulations! You’ve successfully moved your website to a new hosting provider. But hold on, the job isn’t done yet. The next crucial step is to test the migration. This means ensuring everything works just as it did before, or even better. Let’s dive into what you need to check.
Check Website Functionality
First things first, you need to make sure all parts of your website are functioning properly. Here’s a quick checklist:
- Navigate through different pages and see if they load correctly.
- Test forms, contact pages, and shopping carts if you have them.
- Check multimedia content like videos and images to ensure they display properly.
One time, I forgot to check a form on my contact page after migrating. It cost me a few leads because it wasn’t working correctly. Don’t make the same mistake!
Fix Broken Links
Broken links can be a nightmare for both user experience and SEO. After migration, it’s vital to identify and fix any broken links. Here’s how you can do it:
- Use tools like Dead Link Checker or Broken Link Check to scan your website.
- Manually visit pages and click on links to ensure they lead to the correct locations.
- Update or remove any broken links you find.
Remember, a broken link might seem small, but it can lead to a frustrated visitor who decides to leave your site. Better safe than sorry, right?
By following these steps, you’ll ensure your website migration is a smooth process. Happy testing!
Going Live
After all the preparation and hard work, it’s time for the final step: going live with your new hosting provider. This phase is crucial as it involves making your website accessible to the world from its new home. Let’s delve into the key steps to ensure a smooth transition.
Switch Dns To New Server
One of the first things you need to do is switch your DNS settings to point to your new server. This process is akin to changing your home address so your visitors know where to find you. Here’s how you can do it:
- Log in to your domain registrar account.
- Navigate to the DNS settings or DNS management area.
- Update the nameservers to those provided by your new hosting provider.
- Save the changes and wait for the DNS to propagate, which can take up to 48 hours.
Tip: During this period, your website might temporarily be accessible from both the old and new servers. Don’t panic; it’s normal!
Monitor Website Performance
Once the DNS changes have propagated, it’s essential to monitor your website’s performance. This ensures that everything is working smoothly and helps you catch any issues early. Consider the following checklist:
- Check all pages for loading speed. Slow pages can frustrate visitors.
- Verify that all links are working correctly. Broken links can harm your SEO and user experience.
- Ensure all forms and interactive elements are functional. A non-working contact form can lead to missed opportunities.
- Monitor traffic using tools like Google Analytics to observe any unusual dips or spikes.
It’s also wise to get feedback from a few trusted users. Ask them to navigate your site and report any issues they encounter. Sometimes, a fresh pair of eyes can catch problems you might have missed.
Feeling a bit nervous? That’s completely normal. Migrating a website is a significant task, but with careful planning and execution, you’ll see it through smoothly. Remember, the key is to remain patient and vigilant, addressing any issues promptly. So, take a deep breath and get ready to welcome your visitors to your new digital home!
Post-migration Tasks
After successfully migrating your website to a new hosting provider, you must focus on several post-migration tasks. These tasks ensure your website runs smoothly and efficiently on the new server. Ignoring these tasks can lead to issues that may affect your site’s performance and security.
Update Backups
One of the first steps is to update your backups. Your website’s data is crucial. Ensure you have a fresh backup from the new hosting environment. This helps in quick recovery in case something goes wrong. Use your hosting provider’s backup tools or third-party services. Set up automatic backups if available. This step ensures you can restore your site to its current state anytime.
Review Hosting Plan
Next, review your hosting plan. Ensure it meets your current and future needs. Check the resources provided by your new hosting provider. Compare them with your previous host. Are there differences in storage, bandwidth, or other features? Ensure your plan supports your website’s growth. Look at the support options. Ensure you have access to help if needed. This review helps you avoid surprises and ensures smooth operation.
Frequently Asked Questions
How Do You Transfer Your Website To Another Hosting Provider?
To transfer your website, backup your files and database. Choose a new hosting provider. Upload your files and database to the new host. Update your domain’s DNS settings. Test your website thoroughly.
How Long Does It Take To Migrate A Website To A New Host?
Migrating a website to a new host typically takes 1-3 hours. Larger sites may take up to 24 hours.
Is It Easy To Migrate Web Hosting?
Yes, migrating web hosting can be easy. Many hosting providers offer migration services. Proper planning and following steps ensure a smooth transition.
How Do I Move My Domain To A New Host?
To move your domain, unlock it and get the authorization code. Update DNS settings at the new host. Confirm the transfer via email.
Conclusion
Migrating a website to a new hosting provider can seem daunting. But with careful planning, you can handle it smoothly. Follow the steps outlined, and your site will be up and running quickly. Remember to backup your data before starting.
Double-check everything after the move. This ensures everything works perfectly. Lastly, don’t hesitate to seek help if needed. A smooth migration leads to a better website performance. Happy migrating!